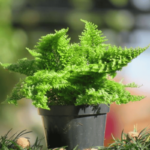
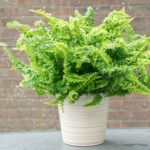
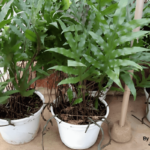
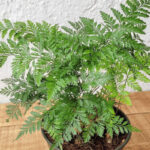
The rabbit’s foot fern is a plant loved by growers for its furry rhizomes and lacy fronds.
The beauty of its leaves and rhizomes, along with its easy care, make it a popular choice for indoor or garden settings.
If you already have or plan to buy this fern, keep reading this article, as you will learn about its curiosities, characteristics, and, most importantly, how to grow it correctly.
How to care for the rabbit’s foot fern

Among the various ferns you can grow in your home, this species is probably one of the most beautiful and resilient choices.
To grow it and keep it healthy year-round, you need to follow these care guidelines:
- Provide a warm and humid climate, avoiding windy locations.
- Place it where it is protected from direct sunlight and receives plenty of indirect light.
- Offer a potting mix rich in organic matter with good drainage.
- Fertilize during the growing season with fern-specific fertilizers.
- Repot and propagate it at the right times.
- Learn to spot common problems and pests.
Below, we will explain each of these care guidelines in more detail, including why the plant’s leaves may turn yellow and fall during winter.
Where to grow the rabbit’s foot fern
The rabbit’s foot fern is a tropical plant that can be grown indoors or outdoors, with outdoor growing recommended in regions where winter is not too severe.
When choosing where to place your Davallia fejeensis (the scientific name of this species), consider the following:
- Avoid placing it near drafts or heaters, as this plant dislikes excessive ventilation.
- Avoid direct sunlight: place it where it receives indirect light.
- Maintain good humidity, since ferns, in general, thrive in humid environments.
This plant can be placed in various locations in your home or garden. Common options include:
- Indoors: bathrooms, plant stands, shelves, bookcases, near windows, living rooms, and terrariums.
- Outdoors: vertical gardens, hanging baskets, under trees, and balconies.
As for the pot you will use, ferns were traditionally planted in tree fern fiber pots, which provided ideal conditions for these plants.
However, over time, tree ferns have become endangered, so alternatives such as plastic, clay, or coconut fiber pots are now used. Remember that the ideal pot for the rabbit’s foot fern should be wide and shallow, as its roots are small.
Read also:
- Monarch Fern – How to Care and Propagate
- Ribbon Fern or Cretan Brake Fern: How to Plant and Care
- Japanese Fern Tree – How to Care and Characteristics
- How to Care for Ferns in 9 Steps (For Beginners)
Humidity

Ferns, in general, thrive in high humidity, and the rabbit’s foot fern is no exception.
Although it tolerates lower humidity better than other ferns, it still thrives in a humid environment. You may notice your plant suffering from low humidity when the tips of its leaves turn brown.
To increase humidity, you can:
- Mist the leaves in the morning on dry days.
- Place a tray with pebbles and water just below the fern’s pot. Make sure the pot rests on the pebbles without sitting in the water, as this can rot the roots.
- Group it with other plants, which increases the humidity around them.
- Use a humidifier.
Watering
The rabbit’s foot fern enjoys plenty of water, but cannot tolerate waterlogged soil.
When watering is not done correctly, you may notice problems like yellowing and gradually drying leaves or rotting roots.
CAUTION: If you notice yellowing leaves during winter, do not worry; this is normal, and we will explain the reason later in this article.
To water your rabbit’s foot fern, insert your finger about 2.5 cm (1 inch) deep into the potting mix to check if it is still moist. Water shortly before the soil completely dries out.
This fern is very sensitive to salts, so use rainwater or filtered water whenever possible.
During the growing season (from spring to late autumn), you will need to water more often.
Ventilation and lighting
Placing your plant in a closed and stuffy environment is a bad idea and can lead to pest and disease issues.
Areas with too much wind can damage your fern’s leaves and slow its growth.
Ideally, place it where it is sheltered from drafts but receives gentle ventilation.

As for lighting, this is a part-shade plant.
In other words, it enjoys good lighting but cannot tolerate direct sunlight.
Exposing it to direct sunlight can:
- Burn its leaves.
- Interrupt the growth of new shoots.
- Cause the rhizomes to turn dark brown.
Therefore, provide indirect light for this plant.
Temperature
If you live in a region where winter is not too harsh, you probably won’t have significant difficulties with temperature.
However, in colder climates, especially below 13°C (55°F), your fern’s leaves may start to turn yellow and fall. This is common during winter, but don’t worry; new leaves will emerge in spring.
The ideal temperature range for this fern is 15°C to 25°C (59°F to 77°F). At higher temperatures, take care to shield it from direct sunlight and keep the humidity high.
Potting mix
Choosing the right potting mix for your fern will help it develop and prevent issues like root rot.
The ideal potting mix for the rabbit’s foot fern should have a slightly acidic to neutral pH, around 6.0 to 7.0. It should be rich in organic matter, provide good aeration to the roots, and ensure proper drainage.
Materials that can be used in your potting mix include:
- Sphagnum peat moss.
- Worm castings (vermicompost).
- Perlite (for added drainage).
- Fern-specific potting mixes.
- Topsoil.
- Sand.
- Bark chips.
- Charcoal.
- Coconut coir.
- Expanded clay pellets.
In addition to ready-made fern mixes, another highly recommended mix is 2 parts peat moss, 1 part perlite, and 1 part sand.
Fertilization
Despite not producing flowers, ferns benefit from proper fertilization.
The rabbit’s foot fern should be fertilized during its growing season, which runs from early spring to late autumn.
During winter, its growth slows down, and fertilization is not necessary.
During the growing season, you can use either organic or synthetic fertilizers.
Synthetic fertilizer options:
- NPK 12-8-6.
- NPK 10-10-10.
- Fertilizers specifically designed for ferns.
Organic fertilizer options:
- Bone meal.
- Worm castings (vermicompost).
- Eggshells.
When using synthetic fertilizers, be very careful with excess nutrients, as this fern is very sensitive to salt buildup.
Follow the instructions on your fertilizer’s label, and if you can’t find specific information for ferns, you can use 1/4 strength every 2 weeks or 1/2 strength once a month.
As for organic fertilizers, just be cautious if you are growing your fern indoors, as some of them can release unpleasant odors.
Repotting
The rabbit’s foot fern has furry rhizomes (pictured below) that grow beyond the pot as the plant develops. This is normal and does not mean it needs to be repotted.

Typically, repotting is done every 2 or 3 years, when your plant outgrows its current pot and many of these rhizomes are extending outside. To repot your rabbit’s foot fern, follow these steps:
Materials needed:
- A new pot for your plant, which should be 2.5 to 5 cm (1 to 2 inches) wider than the previous one.
- A sharp, sterilized pair of pruning scissors.
- Fresh potting mix.
How to repot your rabbit’s foot fern:
- Repot in spring; this is the best time.
- Remove your fern from the old pot and clean its roots.
- Fill the new pot with fresh potting mix.
- Plant your fern, but take care not to plant it too deep, as it has shallow roots.
- Keep the furry rhizomes above the potting mix. They should never be buried, as this will cause them to rot.
During repotting, you can also propagate your rabbit’s foot fern by division; this procedure is explained below.
How to propagate the rabbit’s foot fern
Ferns do not produce seeds; therefore, they reproduce through their spores (those tiny dots on the underside of their leaves) or by division.
Below, I will explain these two methods in more detail.
Division
Usually, division is done along with repotting.
So, remember that the best time to divide your fern is in spring.
Basically, in this procedure, you will cut a portion of your fern’s rhizome so that it sprouts and generates a new plant.

Below is the detailed procedure:
- Choose a rhizome to cut: pick a darker rhizome with one or two leaves and, if possible, some roots. It should be at least 5 to 7.5 cm (2 to 3 inches) long, with the ideal length being around 15 cm (6 inches). You can also use rhizomes that break during repotting.
- Make the cut: remember to use a sterilized pair of scissors.
- Place it in a pot: the potting mix should be moist and rich in organic matter. Lay the rhizome on the surface and make sure it stays in contact with the soil. If necessary, pin it in place with a U-shaped wire or a hairpin. Do not bury it, as it may rot.
- Cover the pot with plastic: this will maintain good humidity. Also, place it in a location with plenty of indirect light.
- Remove the plastic daily: to let air in and prevent mold.
- Wait for new leaves: on average, after 3 or 4 weeks, you may notice root growth and new leaves on the rhizome.
There you have it; you’ve got a new plant.
Avoid fertilizing this new plant during its first few months, and don’t do this procedure too often, as the rhizomes are essential for the development of your rabbit’s foot fern.
Propagation by spores
Propagating ferns from spores is a challenging task that requires a lot of patience. If you want to multiply your fern, I recommend division.
But, for educational purposes, if you want to germinate the spores of your fern, do the following:
- Check the underside of your fern’s leaves for spores.
- Scrape off the dark spores and place them on a piece of paper or in a clean container.
- Sprinkle the spores over a pot with damp soil rich in organic matter. There’s no need to cover them with soil.
- Cover the pot with plastic to increase humidity.
- Place the pot in a location with plenty of light but without direct sunlight.
- Keep the soil moist but not waterlogged throughout the germination process.
- Be patient: a thin green film usually appears after a few weeks, and the first tiny fronds can take several months to form.
Common problems with the rabbit’s foot fern
Over the years of growing your fern, it’s common to run into problems that can affect the health or appearance of your rabbit’s foot fern.
Especially when care is incorrect, your fern will show some signs that can help you identify the issues.
Below are the main signs your fern might show and their primary causes:
- Yellow leaves with brown tips: the air is too dry, or the temperature is too high.
- Pale leaves and stunted growth during the growing season: lack of fertilization, overwatering, or issues with the climate (too little or too much light, temperatures that are too low).
- Chewed leaves: caterpillars are attacking your fern.
- Light-colored and faded leaves: too much direct sunlight.
- Dark, mushy rhizomes and wilting leaves: root rot caused by soggy soil.
- White, cottony spots on the leaves: mealybugs.
- Burnt leaf tips: fertilizer salt buildup or hard water.
Although the rabbit’s foot fern is generally a trouble-free plant, a few pests and diseases can affect it.
The most common ones are mealybugs, spider mites, fungus gnats, aphids, thrips, and root rot.
Leaves falling in winter
Especially for outdoor plants, when temperatures drop below 13°C (55°F) or the air gets too dry, the leaves of the rabbit’s foot fern may turn yellow and fall off entirely.
If this happens to your plant, don’t worry: it is just resting until spring. In warm homes, it usually stays green all year.
If the leaves don’t fall entirely, you can trim the yellow ones to stimulate the growth of new leaves when spring arrives.
Remember to use sterilized scissors for pruning.
How to identify the rabbit’s foot fern (Davallia fejeensis)
To identify your rabbit’s foot fern, you need to understand that it has some unique characteristics that set it apart from other fern species.
First, let’s start with the most striking and distinctive part of this species, its rhizomes.

Often confused with roots, rhizomes are crucial for the plant’s expansion and for storing water and nutrients.
It’s interesting to note that they’re responsible for the affectionate nickname “rabbit’s foot fern.” This is due to their resemblance to rabbit paws, thanks to the hairs that cover these structures.
They typically have a brownish-yellow color.
In addition to the rhizomes, another very important part of this plant is its leaves.

Growing from the rhizomes, the leaves (fronds) are large; they have a triangular shape reminiscent of lace and are either light green or dark green.
As for its stems (stipes), they are dark brown and twisted, and they are barely visible due to the size of the plant’s leaves.
While researching for this article, I found that, indoors, this species usually reaches 30 to 60 cm (1 to 2 feet) in height. In ideal conditions, its fronds can reach about 1 m (3 feet), according to the RHS.
However, at Longwood Gardens, in Pennsylvania, you can find a rabbit’s foot fern (‘Major’) planted in a hanging basket in 1952 that now measures about 2.9 m (9.5 feet) across.

Your fern will likely stay much smaller, but this example shows how large the species can get when it is well grown over a long period of time.
Characteristics and fun facts
There are two scientific names for this fern. Kew’s Plants of the World Online accepts the name Davallia fejeensis, while the RHS lists it as Davallia solida var. fejeensis. You will find both names in nurseries.
Besides this one, several other species are also commonly called rabbit’s foot ferns or by similar names:
- Davallia canariensis (deer’s foot fern).
- Davallia tyermanii (white rabbit’s foot fern, also sold as Humata tyermanii).
- Davallia trichomanoides (squirrel’s foot fern).
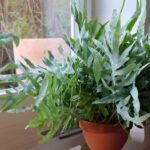
The blue fern (Phlebodium aureum), which also has furry rhizomes, is sometimes called hare’s foot fern too.
The rabbit’s foot fern is native to Fiji, with a few records from Pohnpei (Caroline Islands) and Rapa Iti (Austral Islands). In the wild, it grows on trees or on rocks in humid tropical forests.
The name Davallia pays tribute to the English-born Swiss botanist Edmond Davall (1763–1798).
Here are some other interesting facts about this plant:
- It is not toxic to dogs, cats, or horses, according to the ASPCA.
- It is one of the easiest ferns to grow.
- It can live for decades.
Sources: Plants of the World Online (Kew), Royal Horticultural Society (RHS), ASPCA, UConn Home & Garden Education Center, and Longwood Gardens.
Conclusion
The rabbit’s foot fern (Davallia fejeensis) is an excellent choice for any beginner gardener who wants to have ferns at home.
By following the tips in this article and, most importantly, taking care of your plant with love, I’m sure your rabbit’s foot fern will be beautiful, healthy, and long-lasting.
And if you want to learn more about growing other fern species, check out the other articles we’ve written on fern care.
- Marisa Fern: 7-Step Growing and Care Guide
- Nephrolepis exaltata (Boston Fern) – How to Grow and Care
- Leatherleaf fern – Care, Characteristics and Curiosities
- Maidenhair fern (Adiantum spp.) – Care Guide
Liked the article? Then share it on your social networks and leave your comment below.