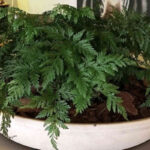
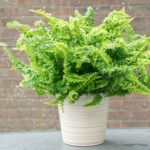
The history of the Boston fern, also known as sword fern, began in 1894.
Discovered by a florist named F. C. Becker, this plant was in a shipment of about 200 ferns that were sent from Philadelphia to Boston (to be more specific, Cambridge, Massachusetts).
As it developed, this plant stood out from the others due to its rapid growth and wide, arching fronds, which caught Becker’s attention. In the same year, he started propagating it.
Two years later, botanists in London identified it as a form of Nephrolepis exaltata, a species described long before, and suggested the cultivar name ‘Bostoniensis’, which gave rise to its popular name, Boston fern.
Today, the Boston fern:
- Is one of the most widely cultivated ferns worldwide.
- Has given rise to dozens of cultivars, most of them natural mutations (sports) selected by nurseries.
- Is regarded as one of the hardiest and easiest ferns to grow.
Continue reading this article to learn about its characteristics, varieties, and, most importantly, how to grow it correctly. If you are new to ferns, also see our general fern care guide.
How to care for the Boston fern

Nephrolepis exaltata is a tropical fern native to the Americas. According to Kew, its native range includes:
- Southern United States (especially Florida)
- Mexico
- Central America
- The Caribbean
- South America
It has also been introduced in other regions, such as parts of Africa, Asia, and Australia.
When properly cultivated, this plant can beautify your home or garden for many years. To successfully grow it, you should follow the care guidelines below:
- Choose the right location to grow it.
- Pay attention to the temperature.
- Provide high humidity.
- Water before the substrate dries out completely.
- Ensure indirect lighting.
- Use good fertilizers in the correct quantity.
- The substrate should be rich in organic material and have excellent drainage.
- Repot when necessary.
- Periodically, prune the fronds.
Below, we will delve deeper into each of these topics.
Where to grow your Boston fern
In its natural habitat, this species thrives in places with high humidity and protection from direct sunlight.
Indoors, you can place it in locations such as:
- Bathrooms
- Bedrooms
- Living rooms
- Offices
Outdoors, ideal locations include:
- Under trees
- Balconies
- Vertical gardens
- Attached to a pergola
When choosing the location to grow your Boston fern, you need to be especially mindful of lighting and humidity.
We will address these topics in more detail shortly.
For now, understand that you should provide protection from direct sunlight, especially during the hottest parts of the day, and maintain high humidity.
Regarding the choice of a pot for the Boston fern, here are some options:
- Terracotta pots
- Coconut fiber pots
- Plastic pots
- Hanging baskets
The pot should have drainage holes to allow water to drain.
Temperature

Temperature is an important factor in the cultivation of this plant, and if you live in tropical areas, you probably won’t have many problems with this care.
It thrives best at temperatures ranging from 18°C to 24°C (65°F to 75°F).
During the winter, if the temperature drops below 7°C (45°F), especially if it is grown outdoors, it’s a good idea to bring it indoors to protect it from frost.
Although it thrives in the temperatures mentioned above, this plant can tolerate temperatures between 7°C (45°F) and 35°C (95°F). More extreme temperatures can harm its development throughout the year.
EXTRA TIP: If you’re growing it in greenhouses with controlled climates, remember that a decrease in temperature during the night is very important. For growers who don’t use greenhouses, this nighttime temperature drop occurs naturally.
Ideal humidity for the Boston fern
Maintaining high humidity is one of the most important care considerations for this plant.
The Boston fern is a plant that thrives in high humidity environments. It does best with humidity of 50% or higher; levels close to 80% are ideal but hard to maintain indoors, especially during the winter when the air tends to become drier.
To maintain good humidity for this fern, there are some strategies you can implement in your cultivation.
The first way is by using a humidity tray with stones or pebbles.
- Choose a tray or dish large enough to accommodate the base of your fern’s pot.
- Add a layer of stones or pebbles evenly to the bottom of the tray.
- Pour water into the tray, ensuring that the water level does not come into direct contact with the plant’s pot.
- Position the fern’s pot on top of the stones or pebbles. Make sure the pot is firmly supported by the stones and not sinking in the water.
This way, water will evaporate slowly, creating a humid environment around the plant.
The second option is lightly misting the leaves of your Nephrolepis exaltata from time to time. Its effect is short-lived, and keeping the fronds wet for long periods favors fungal diseases, so don’t overdo it. A room humidifier is also a great option.
Remember to maintain high humidity for your Boston fern; it’s essential for the healthy development of this plant.
See also:
- Rabbit’s Foot Fern (Davallia fejeensis): Cultivation Guide
- Leatherleaf fern – Care, Characteristics and Curiosities
- Monarch Fern – How to Care and Propagate
- Marisa Fern: 7-Step Growing and Care Guide
How and when to water
Watering the sword fern is straightforward; you should water it before the substrate completely dries out, but when watering, be careful not to soak the soil.
As mentioned earlier, this is a plant that loves moisture, so keeping the soil consistently moist (not waterlogged) is crucial for the correct cultivation of the sword fern.
Here are some extra tips that can help you:
- To check if it’s time to water, stick your finger about 2.5 cm (1 inch) into the soil and see if it’s already dried out. Watering should be done just before it’s completely dry.
- During the colder months, reduce the frequency of watering.
- Be cautious because overwatering can lead to a condition called root rot.
- Using rainwater can be an excellent idea.
- Water during the early morning or late afternoon. Never water during the hottest hours of the day.
- To ensure you don’t overwater your fern, water it slowly until the water begins to drain from the base of the pot.
Proper lighting

Providing good lighting is essential for the healthy growth of your fern.
The Boston fern is a plant that thrives in partial shade and should never be exposed to direct sunlight for extended periods, especially during the hottest parts of the day.
To avoid burning the leaves or more significant lighting issues, place your Nephrolepis exaltata in a location where it receives indirect sunlight and, from time to time, rotate the pot so that all sides of your fern receive light.
If your sword fern is getting too much sunlight, you may notice that some leaves are burned. Now, if it’s getting too little light, you’ll notice dull and fewer leaves.
Further down in this article, we will delve into more details about the meanings of the spots that appear on the leaves of this fern.
How to fertilize and the best fertilizers
Fertilization plays an extremely important role in the healthy growth and development of your fern. By providing the necessary nutrients, your plant will have more vitality, growth, and more stunning leaves.
The Boston fern is a plant that needs monthly fertilization during spring and summer, but it’s not necessary to fertilize during autumn and winter.
A great option for chemical fertilizer for this plant is NPK 20-10-20 soluble in water. Now, if you want to use organic fertilizer, a good option is worm castings, which release nutrients slowly.
To use worm castings as fertilizer, simply spread a thin layer over the substrate of your plant. Then, water it as usual.
Avoid using eggshells on this fern: they are rich in calcium carbonate, which raises the soil pH, and the Boston fern prefers slightly acidic soil.
NOTE: When using chemical fertilizers, use half of the recommended fertilizer on the package. Overfertilization will result in dry and dark tips on your leaves. See here how to correct excess fertilizer.
Choosing the ideal soil

The ideal soil for the Boston fern should have excellent drainage, be slightly acidic, with a pH between 5.0 and 6.0, and be rich in organic materials. To achieve this, you can use a mixture of peat with perlite or gravel at the bottom of the pot to ensure good drainage.
Other options for use in the substrate of your Nephrolepis exaltata include:
- Substrates specifically designed for ferns that are available for purchase
- Worm castings
- Topsoil
- Coconut coir
- Sand
Remember to maintain well-draining soil with plenty of organic material.
Repotting
There are three main reasons that might lead you to repot your fern:
- Root-bound plant (usually repot every 2 years)
- Old substrate (occurs only when you leave your fern with the same substrate for several years)
- Disease attacking the roots (mainly caused by overwatering)
In any of these cases, it’s important to understand that repotting is a procedure that can stress your plant and should not be done at the wrong time.
Some basic precautions to ensure that repotting is done at the right time are:
- Do it during your fern’s growing season, preferably in early spring.
- If you’ve recently purchased it, wait a few weeks before repotting because it will already be expending its energy to adapt to the new environment, and repotting at this time can cause significant stress to your fern.
Now, you will learn how to repot your Boston fern.
How to repot the Boston fern
Tools and preparation:
- Gather the necessary tools: clean and sharp pruning shears, a damp cloth, a new suitable pot, and your soil mix.
- Choose a slightly larger pot than the previous one. Make sure it has drainage holes at the bottom to prevent water accumulation. Several pot options that can be used for your sword fern were mentioned at the beginning of this article.
- Disinfect the pruning shears to prevent the spread of diseases. Clean the blades with alcohol or an appropriate disinfectant solution.
Pruning and cleaning:
- Begin with pruning. Look for dead, damaged, or diseased fronds. Cut them as close to the base of the plant as possible using clean pruning shears.
- After pruning, take a damp cloth and wipe the fern’s leaves to remove debris and dust. This will allow the plant to breathe better and absorb light more effectively.
Preparing the new pot:
- Substrate for drainage: place some gravel, pebbles, or perlite at the bottom of the pot to ensure good drainage and prevent root saturation.
- Partially fill the pot with the substrate: Remember to leave enough space to fit your fern into the pot.
Removing the fern from the old pot:
- Lightly water the fern before starting repotting. This will make the roots more pliable.
- Remove the fern from the old pot. To do this, carefully wrap your fingers around the base of the fern’s leaves. Invert the old pot and gently tap or shake it against a hard surface until the plant loosens from the pot.
Repotting:
- Clean the roots: gently loosen the root ball and remove the old, decomposed substrate.
- Place the fern in the new pot, ensuring that the plant’s crown (the central part where the leaves emerge) remains at the same level as it was before. Do not bury the crown, as this can lead to rotting.
After repotting, place your fern in a location with ideal conditions for its growth.
Pruning
Pruning the Boston fern is simple and helps keep it full and healthy.
Follow the tips below:
- Use clean and sharp pruning shears.
- Cut dry, yellow, or damaged fronds as close to the base of the plant as possible. This also encourages the growth of new fronds.
- If there are too many runners (the long, thin stems that hang from the plant), you can trim some of them. You can also use them to make new plants, as you will see below.
- The best time for heavier pruning is spring, at the beginning of the growing season.
How to propagate your Boston fern

The Boston fern can be propagated in three ways:
- Runners (stolons)
- Division
- Spores
Runners are the long, thin stems that hang from the plant. Where they touch the soil, they form roots and a new plant. To use them, press the tip of a runner onto a small pot with moist substrate, keep it attached to the mother plant until it roots, and then cut it.
To divide your Boston fern, wait for the growing period (spring and summer), remove your fern from the pot, and divide the root ball with a clean knife, keeping as many leaves intact as possible.
The video below will help you understand this process better.
Propagation by spores is a more complex and time-consuming task. Most Boston fern cultivars are sterile or don’t come true from spores, so this method is mainly used for the wild species.
If you want to try propagating your Nephrolepis exaltata from spores, the video below can help.
Common problems
During the cultivation of your Boston fern, you may encounter some common issues.
- Falling leaves
- Spotted or discolored leaves
- Pest infestations
- Disease outbreaks
In this section, you will learn how to interpret the meanings of spots on your Boston fern’s leaves, identify possible pest and disease threats, and, most importantly, discover appropriate measures to combat them and ensure your plant’s health.
Black or brown spots on the leaves
In the vast majority of cases, dark spots are signs of serious problems, but if they appear in an orderly fashion on the underside of your sword fern’s leaves, they are the spores of your plant, so don’t worry.

The aging of leaves also causes brown or black spots; normally, this occurs first with the leaves at the base of the plant.
Another common reason for brown or black leaves on your Boston fern is cultivation mistakes, especially regarding watering your plant.
Few leaves or falling leaves
A Nephrolepis exaltata with sparse foliage, long, weak leaves, and a very dark green color usually needs more light.
It is normal for some leaves of your sword fern to fall over time. However, if many leaves fall suddenly, this may be a sign of stress due to recent changes or lack of watering.
Yellow leaves
The main reasons that can cause the yellowing of your Boston fern’s leaves are:
- Leaf aging (only a few leaves will turn yellow)
- Low humidity
- Overwatering (more common cause)
- Strong winds and low temperatures (the leaves turn yellow with dry tips)
Pests and diseases
There are several pests or diseases that can attack your Boston fern, with the most common ones being:
Pests
- Whiteflies
- Scale insects
- Snails
- Slugs
- Caterpillars
Below, I have included some videos that can help you identify and combat these and other pests that can attack your fern.
Diseases
There are also some diseases that can attack your sword fern:
- Root rot: You can avoid this problem by watering your fern correctly. To treat it, remove your fern from the pot, cut off the rotten roots, and replace the substrate.
- Rhizoctonia aerial blight: The image below shows how your fern’s leaves look after being infected by this disease. To prevent it, avoid keeping the fronds wet for long periods and provide good air circulation.

Characteristics of Nephrolepis exaltata
Nephrolepis exaltata is a terrestrial or epiphytic fern and is the most cultivated species in the Nephrolepis genus.
In the Americas, it is found in the following locations (in green).

Its fronds usually reach 60 cm to 1.2 m (2 to 4 feet) long. It has a short, upright rhizome and no woody stem.
Its leaves resemble the blades of a sword (hence its nickname, sword fern).
With its long, curved leaves, this plant looks great in a hanging pot with space above and below. The leaves grow upwards and then hang downwards. The more space you give it, the more beautiful and full it becomes.
According to the ASPCA, the Boston fern is not toxic to animals and can be grown without problems near dogs or cats.
As mentioned at the beginning of this text, the Boston fern easily produces natural mutations; thanks to them, we can find several varieties of Nephrolepis exaltata, the main ones being:
- Nephrolepis exaltata ‘Bostoniensis’ (Boston fern)
- Nephrolepis exaltata ‘Fluffy Ruffles’
- Nephrolepis exaltata ‘Marisa’
- Nephrolepis exaltata ‘Rita’s Gold’
- Nephrolepis exaltata ‘Tiger Fern’
- Nephrolepis exaltata ‘Whitmanii’
- Nephrolepis exaltata ‘Suzi Wong’
- Nephrolepis exaltata ‘Dallas’
- Nephrolepis exaltata ‘Compacta’
Some ferns sold alongside Boston ferns belong to other species, such as the Kimberly Queen fern (Nephrolepis obliterata), the Macho fern (Nephrolepis biserrata ‘Macho’), and the Lemon Button fern (Nephrolepis cordifolia ‘Duffii’).
Below are some photos of this plant.


Conclusion
Commonly used in interior decoration, the Boston fern has become a great success among plant lovers due to its beauty and how easy it is to grow.
By following the steps described in this article, I am confident that your Nephrolepis exaltata will be beautiful and healthy.
And if you want a summary of everything presented here, here is an infographic on the cultivation of this plant.

Thank you for reading this text, which was created after much research and dedication.
Leave your comment below; I would love to hear a bit about your experience with this plant, and also share this article on your social networks.