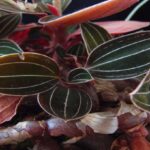
Spots that appear on orchid leaves can have various meanings.
In some cases, they are just characteristics of your orchid, while in others, they might indicate cultivation problems or even diseases that need to be addressed.
That’s why, remember…
If you want to succeed in cultivating your orchid, you need to understand what these spots mean.
And that’s exactly what we’re going to talk about in this article.
Learn How to Achieve Super Blooms on Your Orchids
🛑 If you love orchids and you're tired of not being able to make them bloom...
Then, know that thousands of beginner growers are achieving beautiful flowers on their orchids by following this method.
Click the button below to have beautiful orchids with show-worthy flowers every year. ⤵
Types of Spots on Orchid Leaves
Not always a spot, mark, or change in color on your orchid means something bad.
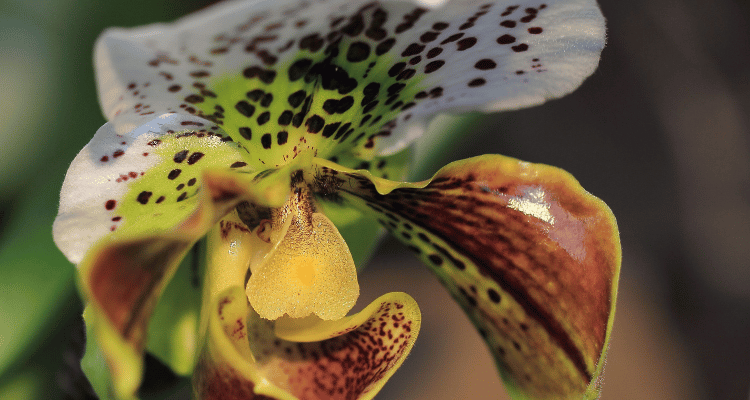
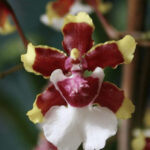
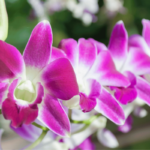
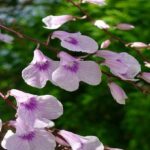
For example, some species naturally have small spots on their flowers, like the Paphiopedilum shown below.
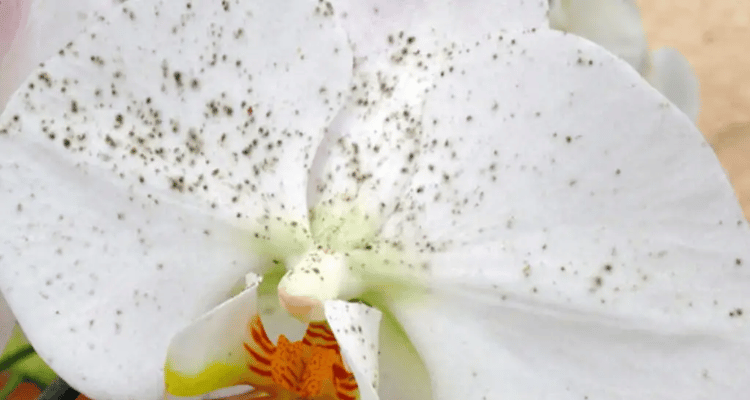
On the other hand, spots on flowers can indicate diseases or pest attacks, like the Phalaenopsis shown below, which is affected by a disease known as gray mold:
In the first part of our text, you will learn to distinguish whether a spot on the leaves or flowers of your orchid represents a threat or if it’s something natural for your plant.
Natural Spots on Your Orchid
There are 2 types of natural spots that often confuse beginners who are starting to care for orchids.
The first type is the yellowish spots that appear on some orchid leaves as they age.
I’ll explain them in detail in the “Yellow Spots on Leaves” section.
The second type is the spots that naturally appear on the flowers of some orchid species.
To find out if your orchid has flowers with small spots, do the following:
- Look for photos of species similar to yours on the internet.
- See if other plants of this species also have spots.
- If they have spots, it’s natural.
Remember that orchid species are not genera, see the example:
Genus: Cattleya
Species: Cattleya walkeriana
That is, the species is more specific than the genus, and you should look for your species.
Troublesome Spots
As the name suggests, these spots indicate that your plant is in trouble.
These spots can be due to a small mistake in its cultivation, or perhaps your orchid is being attacked by pests or diseases.
Disease Attacks
There are several diseases that cause spots on orchid leaves, such as:
- Black Rot;
- Anthrachnose;
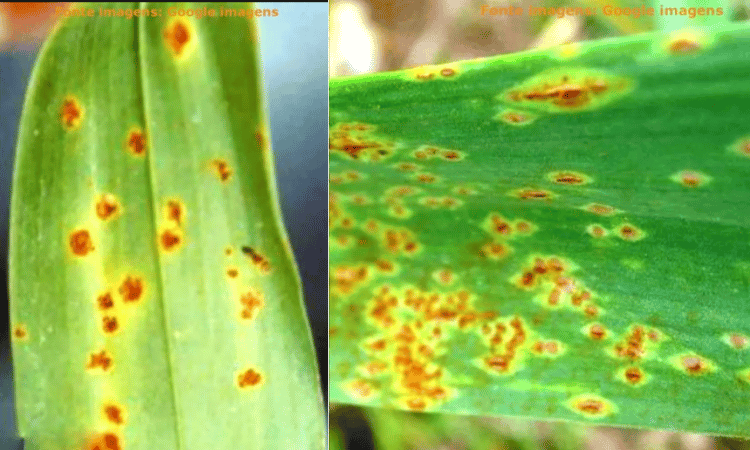
- Rust;
- Gray Mold;
- Cercospora;
- Among others.
Your plant can have spots of various colors, but they won’t always be related to diseases.
Therefore, remember:
Usually, spots on leaves caused by diseases in orchids have 2 characteristics:
- The spot becomes soggy.
- The spot has a red or yellow border.
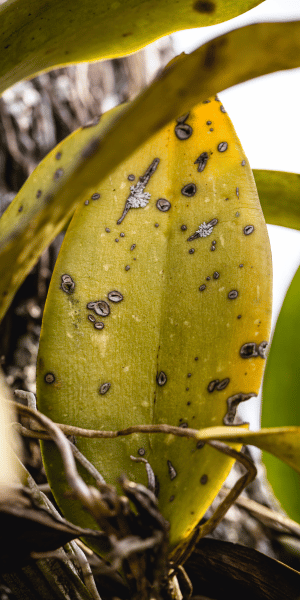
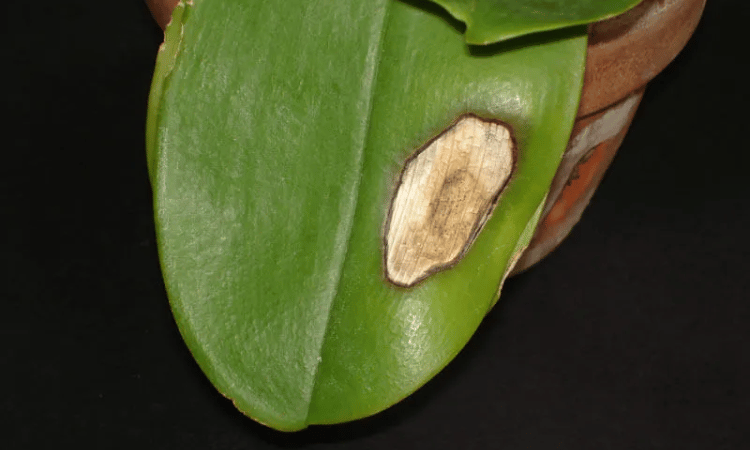
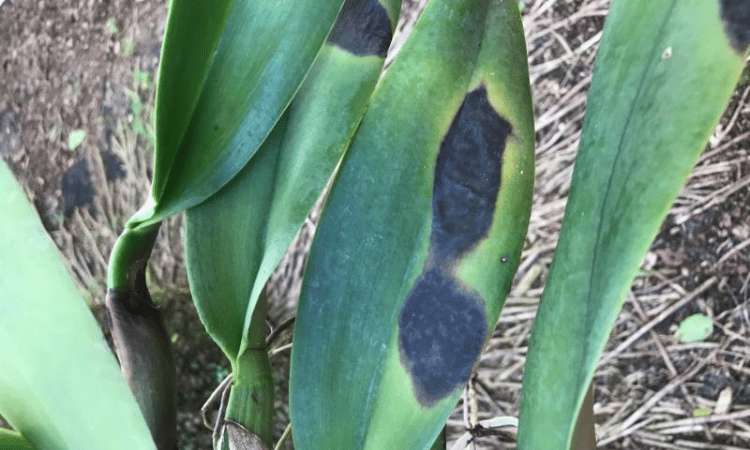
So, if your orchid has yellow leaves and black spots like in the image below, it might be a sign that it’s being attacked by some disease.
Cultivation Mistakes or Pest Attacks
Spots caused by mistakes in its cultivation or by pest attacks usually do not have borders and can be resolved more easily than spots related to diseases.
The most common cultivation mistakes that can cause spots on your orchids are:
- Over-fertilizing your orchid;
- Under-fertilizing your orchid, causing it to lack important nutrients;
- Excessive lighting;
- Excess or lack of water.
As for pests attacking your orchid, they usually leave small spots or holes in your orchids.
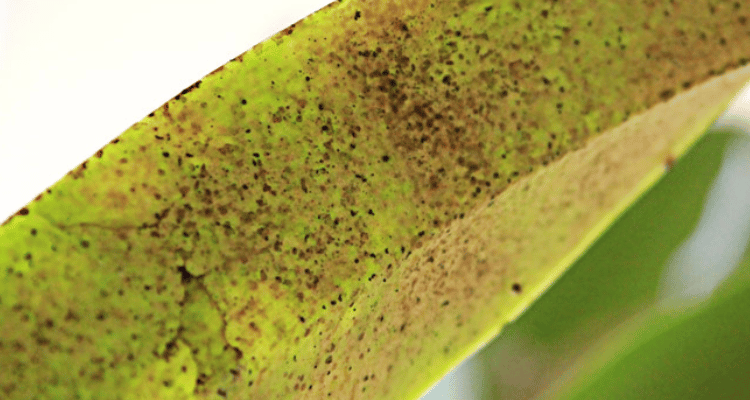
Below, we’ll delve into each type of spot that can appear on your orchid’s leaves.
Yellow Spots on Orchid Leaves
This is one of the most common spots that appear on orchid leaves and, most of the time, it doesn’t pose a danger to your plant.
Below are the main reasons that can cause your orchid to have yellow leaves:
- The leaf is getting old;
- Excessive sunlight;
- Excess water;
- Dehydration;
- Soft Rot (Pectobacterium).
See below how to differentiate these yellow spots.
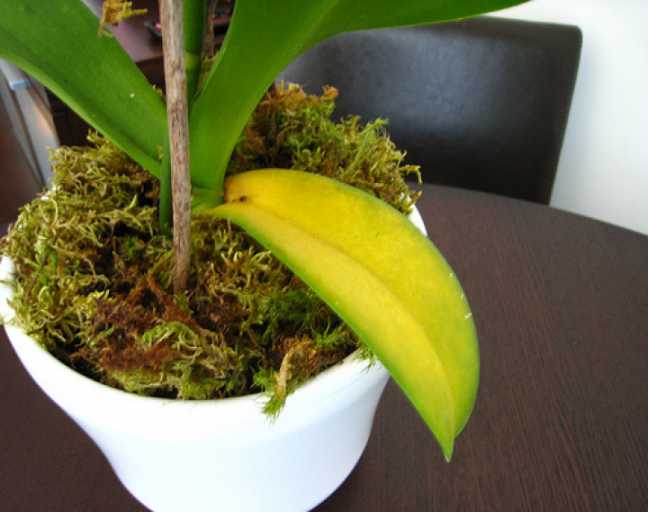
1) The Leaf Is Getting Old
Old leaves turn yellow and fall off.
You’ll notice this because:
- The orchid is producing new healthy shoots.
- The orchid doesn’t seem sick.
- The yellowish spot is not present on all leaves.
If this is your problem, you can cut the yellowed leaf of your orchid with sterilized scissors.
Do You Want to Learn How To Keep Your Orchids Healthy And Ready to Bloom Every Year?
So, I prepared a complete guide, step by step and illustrated, that will show you:
• The secrets to getting beautiful flowers every year
• How to fight and identify pests and diseases on your orchids
• THE MAGIC SUBSTANCE for orchids and how to use it
• And much, much more.
The great news is that the manual is now available at a super discount!!
But beware, it's only for the first buyers.
Click on MORE INFORMATION below and discover the secrets to show-worthy flowers. 👇
2) Excessive Sunlight
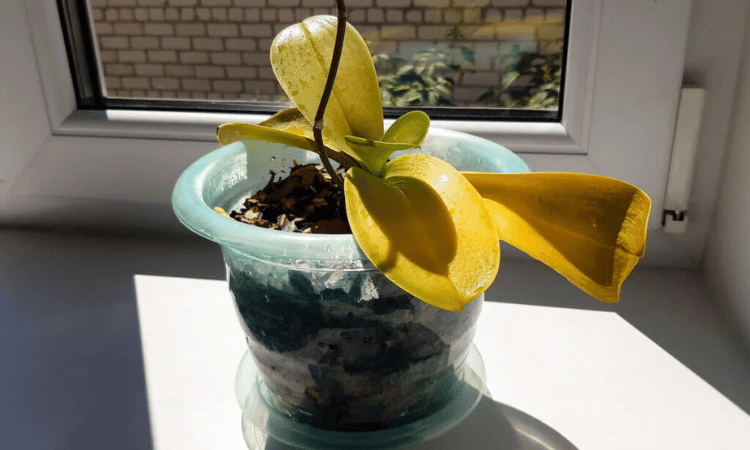
In this case, you’ll notice that leaves receiving more sunlight are turning yellow.
To counteract this cause of yellowing, do the following:
- Check if your plant is in a very bright place, especially if it’s receiving direct sunlight.
- If the answer is yes, then simply move it to a shadier place.
- If your orchid’s leaf is turning darker green, it needs more sunlight.
Pruning won’t work here because the problem to be solved is the amount of sunlight your orchid is receiving.
3) Excess Water
In this case, the yellowed leaf can occur, but it’s not the most common sign of excess water.
There are better ways to identify that you need to water your orchid less, for that, check if the roots are:
- Gray;
- Softened;
- Smell musty.
To address this problem, simply increase the interval between watering.
4) Dehydration
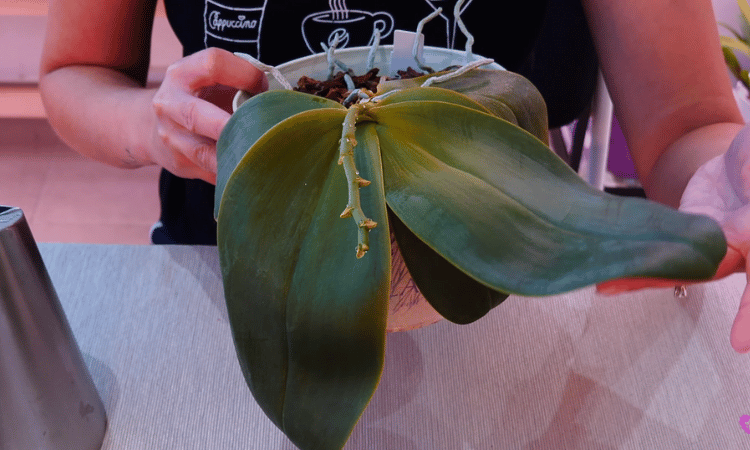
Wilted and yellow leaves in orchids usually mean that your orchid is dehydrated.
Therefore, check if your roots are healthy and, if necessary, increase the watering.
Know that this is a common problem.
But be careful not to be deceived…
An orchid can dehydrate for two reasons:
- Excess water (you watered so much that the roots rotted);
- Lack of water.
Therefore, find out what the real reason for the problem is.
This problem occurs especially after stimulating a second flowering in orchids because it generates great exhaustion in orchids.
If your orchid is almost dying, watch the video below:
5) Soft Rot
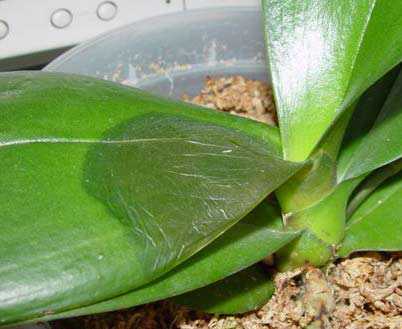
These are the spots that, if not treated correctly, will cause a serious problem in your orchid.
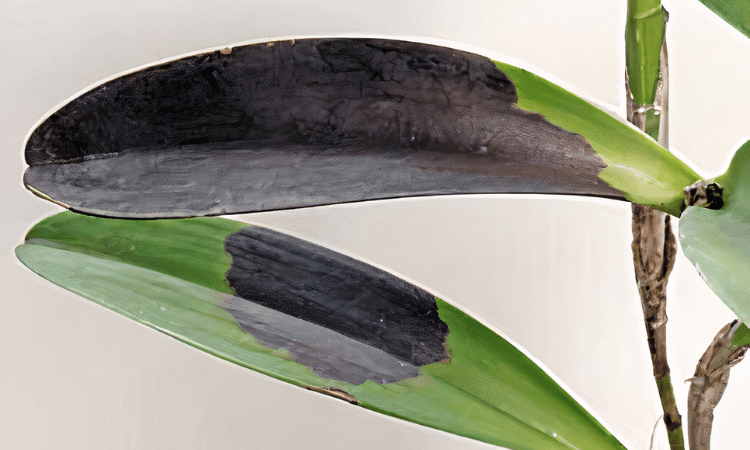
If your orchid has a slightly yellow leaf with a soaked-looking spot, it has Pectobacterium, also called black rot or soft rot.
The first thing you should do is separate it from the other plants.
Paphiopedilum: Leaves develop small round spots, often near the middle of the leaf. The spots are initially yellow and water-soaked but eventually turn reddish-brown and sunken.
Dendrobium: Leaves appear yellow and water-soaked, turning black and sunken.
SOURCE: Staug Orchid Society
White Spots on Orchid Leaves
There are 4 common problems that can cause white spots on your orchid leaves:
- Watering with high iron content.
- Mealybugs.
- Sunburn.
- Snow mold.
Below, I will talk a little more about these 4 causes, how to avoid them, and also how to treat them.
01) Water with High Iron Content
When the problem is high iron content in your watering, you will notice white or brown spots on your orchid leaves.
- Flush the plant.
- Remove any excess you notice (you will usually see some “salts” in the substrate).
- If possible, use rainwater for your next watering.
Remember to boil the water and let it cool before watering.
02) Sunburn (Excessive Light)
This is an advanced stage of sunburn:
- Stage 1: Yellow or reddish spots;
- Stage 2: White or brown spots;
- Stage 3: Black spots.
Basically, when the orchid is exposed to too much sunlight, its leaves turn yellow, then white or brown, and eventually black.
In this case, it is recommended to move your orchid to a place with more shade.
The affected leaf will not return to normal.
03) Mealybugs
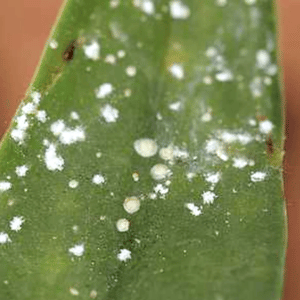
Mealybugs are the main cause of white spots on orchid leaves.
But these are not spots.
What you are seeing is the clustered mealybugs.
They are so small that when there is an infestation, they appear as a spot on the orchid.
If your plant has this pest, the leaf will be sticky.
To kill mealybugs, follow these steps:
- Use a cotton ball or a toothbrush.
- Rub isopropyl alcohol on the affected leaves.
- Make sure you have applied alcohol to all parts of the leaf, as mealybugs tend to hide in small crevices.
- Afterward, quickly check other leaves, roots, and the pot to ensure your orchid does not have this problem anymore.
04) Snow Mold – White Fungus on Orchids
There are two problems in orchids that are often described by growers as “white fungus on orchids.”
The first is an infestation of mealybugs, while the second is an attack by the fungus Ptychogaster sp, commonly known as snow mold.
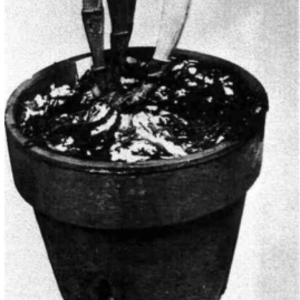
As described in this file, snow mold appears on top of your orchid’s substrate and gradually spreads throughout the pot.
On the other hand, mealybugs, as described above, are not fungi and are much more common in orchids.
Red Spots on Orchid Leaves
Red spots on orchid leaves can mean various things, but most of the time, your orchid is suffering from excess or lack of nutrients (i.e., a mistake in fertilization).
Below are the most common causes of red spots on orchid leaves:
- Excessive sunlight;
- Lack of magnesium;
- Phosphorus deficiency;
- Rust (orange spots).
Below, we will go into more detail about each of these problems:
01) Excessive Sunlight
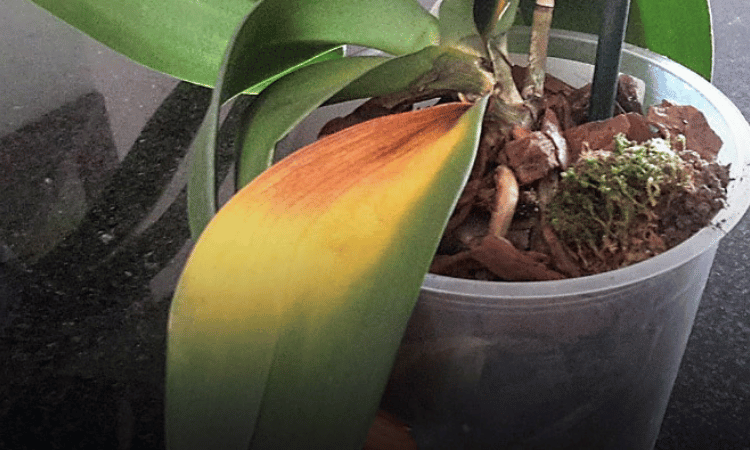
If this happens, your orchid’s leaf will turn red and also a little yellow, as shown in the image.
To resolve this, place it in a shadier location.
02) Lack of Magnesium
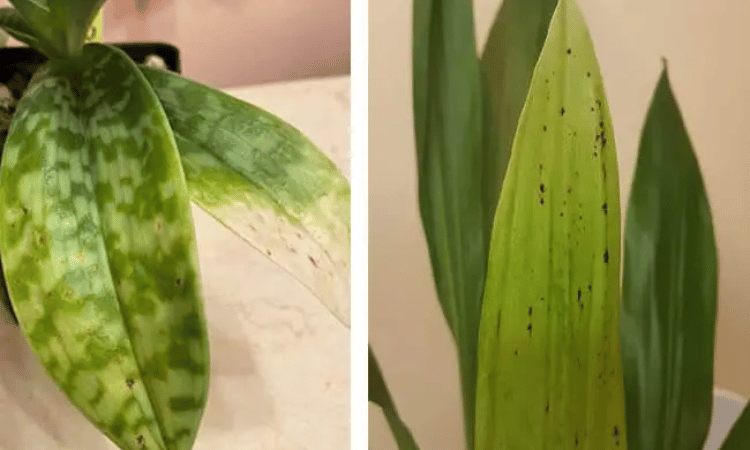
Orchid with magnesium deficiency. In this example, red spots did not appear. (Source: ask gardening)
The leaf cannot produce enough chlorophyll.
In some cases, some parts turn green while others turn yellow, brown, or red, and the leaves may curl.
To learn more possible causes of red spots on orchids caused by excess or lack of nutrients, visit this page.
03) Phosphorus Deficiency
The symptoms of this problem were described below by Agronomist Juscelino Nobuo Shiraki.
Underdeveloped plants; bluish-green leaves; sometimes red-purple tones appear on the plant; yellowish leaves, primarily in older ones, not very shiny and eventually showing brown spots; dormant lateral buds; delayed flowering; reduced number of flowers.
Juscelino Nobuo Shiraki
04) Rust
Rust is a fungus that appears especially in regions with high humidity and cold temperatures.
Its symptoms are orange spots that appear on your orchid’s leaves and gradually darken.
Normally, rust in orchids comes with orange, yellow, or brown spots or powders.
It is recommended to cut and burn the infected parts.
Black Spots on Orchid Leaves
Black spots on orchid leaves are usually indicative of diseases or advanced cultivation problems. Here are the main issues that cause these spots on orchids:
- Black rot;
- Sunburned leaves;
- Pest infestation;
- Excessive fertilizers;
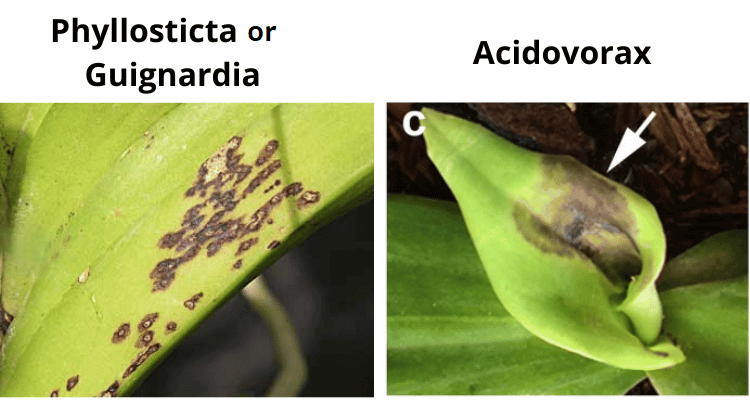
- Phyllosticta or Acidovorax.
Below, we will detail each of these problems further.
01) Black Rot
Black rot is a disease caused by fungi that occurs due to two things:
- Heat
- Too much water
Before reaching the leaves, black rot affects the plant’s shoots. If not taken care of within a week, it can spread throughout the plant, increasing the chance of your orchid dying.
See below how to combat this disease:
Combating Black Rot
You can use the method described in the video above to combat this disease, or follow the steps below:
- Separate the plant from the others.
- Remove the substrate from the plant.
- Let the orchid remain without substrate for a few days, keep it dry for about 15 to 20 days.
- Replant it normally.
NOTE: Discard the substrate and the pot where the contaminated plant was.
You can also thoroughly clean both and reuse them, but it is not recommended.
Now that you know how to take care of black rot, it’s time to learn how to combat other diseases of your orchid and, most importantly, how to prevent them.
See also:
02) Sunburned Leaves
As explained earlier, when your orchid receives excessive light, it starts developing spots on its leaves.
First, it turns yellow or slightly reddish, then white spots appear, and if nothing is done, the leaves will turn black due to burns caused by excess light.
03) Pest Infestation
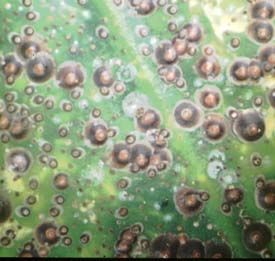
Pest attacks causing black spots are rare.
- Attacks by mealybugs can cause black blisters (see the image).
- Viruses caused by mites also create spots that are black in some parts.
- Beetle larvae.
Most pests can be avoided by keeping your growing area clean.
04) Excessive Fertilizers
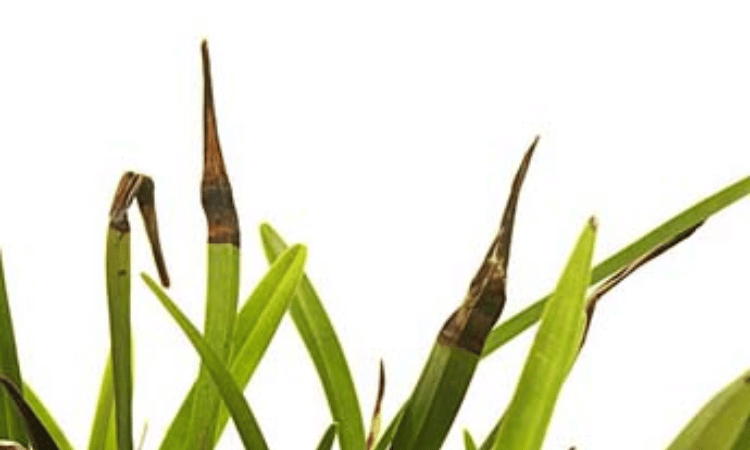
This problem can be caused by excessive fertilizers or too much salt in the water.
You will typically notice the tips of your orchid’s leaves with black spots.
05) Phyllosticta or Acidovorax
To learn how to identify and treat these diseases correctly, I have separated 2 texts for you:
- http://www.aos.org/orchids/orchid-pests-diseases/phyllosticta-leaf-spot.aspx – Phyllosticta
- https://staugorchidsociety.org/PDF/BacterialBrownSpotbySueBottom.pdf – Acidovorax
How to Prevent Orchid Diseases
Below are the best tips for you to prevent diseases in your orchids.
By following these tips, you can eliminate spots on your orchid leaves.
First, the care for younger orchids in your orchidarium:
- Buy orchids from reputable stores; this is essential to ensure they do not come with any problems.
- When you receive your orchid, place it separately from the others for 40 days, and during this time, observe it, looking for diseases.
- When placing your orchid, never stack one on top of the other, as many diseases are transmitted through water.
Now the tips on the locations where you put your orchid and what to put in it.
- Place it in a well-ventilated and well-lit location.
- The location of your orchid should be clean.
- Use transparent pots so you can easily observe the orchid’s roots.
- Never place stones in the pot.
- If your pot has more than 10 holes, use a plate underneath (as the water drains a lot through these holes, the roots can end up sucking salts).
- Water the orchid in the morning or late afternoon.
- Use rainwater.
- Use boiled and cooled water if rainwater is not available.
- Before adding the substrate, boil it for a few minutes to ensure it is clean.
- If your orchids are in an orchid nursery, it must have a floor that drains quickly.
- If it is planted in the ground (terrestrial orchids), check that the area around it is not too dirty, try to avoid the main pests (snails, garden bugs).
Finally, check your orchid every 15 days or a month and pay attention to these issues:
- Stains;
- Yellowing of the leaves;
- Fallen buds;
- Changes in color;
- Leaf swelling.
Treating Fungi in Orchids
If you have only one contaminated leaf, cut it and dispose of it properly.
This is the quickest and recommended method.
But if your orchid is being infested by fungi, follow these tips:
Basically, you can use chemical or natural fungicides.
Chemical ones are easier to handle and almost always more efficient; they can also be divided into 2 categories:
- Systemic: These penetrate the plant and kill all fungi. Be very careful when applying them; they are recommended for more severe diseases.
- Contact: These do not enter the plants. They remain on the surface and are recommended for milder diseases.
If you want to learn how to make natural fungicides, I’ve selected some videos for you to learn visually.
Some people recommend Bordeaux mixture, while others don’t. I have never tested it, so I cannot recommend or criticize it.
Conclusion
I hope this article has helped you understand what the spots on orchid leaves mean.
If you want to learn more about growing orchids, I recommend you check out the articles below:
Additionally, please help us share this information with more people.
Share this article on your social media by clicking the icons below.

